UiPath Setup: Cloud Account Orchestrator Studio Run Process
Today we are going to check UiPath Setup on Cloud Account, Orchestrator, install Studio, Activate License, Publish Project, and kickstart automation of your first project.
Before this, you need to learn the UiPath Core Component and Architecture which gives you an overview of how UiPath works.
we’ll walk through the steps of using Studio to create a new process, publish it to Orchestrator, and run it with Assistant.
To have a good understanding of what all these steps involve, we’ll access UiPath Automation Cloud to create a new account and organization. Afterwards, we’ll invite a new user in the ‘Group Membership’ and allocate a license type Automation Developer Named User.
Next, we’ll login to Automation Cloud as the new user, download, install Studio, and create a new process. We’ll then add two activities and publish our project to Orchestrator. The last step is to run the newly published process with the UiPath Assistant.

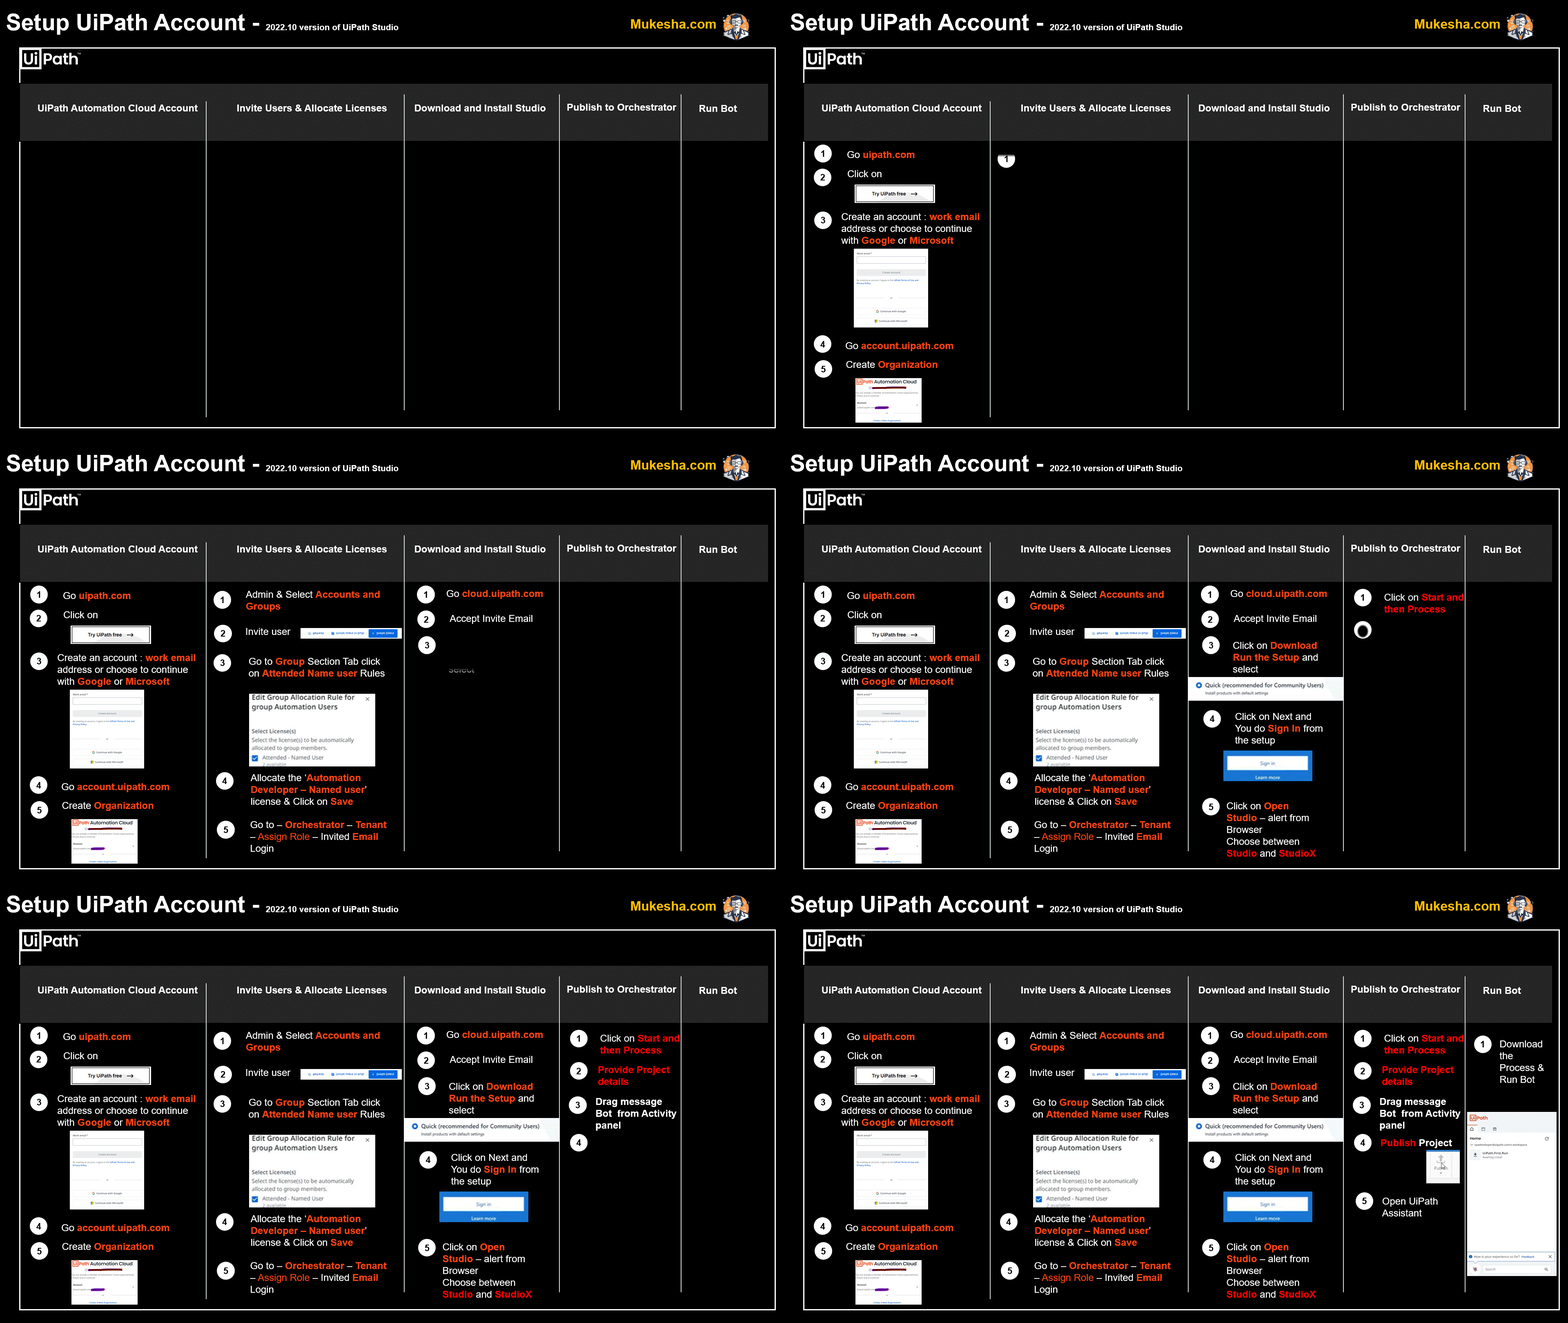
UiPath Setup Automation Cloud Account
- Open the browser and access uipath.com
- Now let’s ‘Try UiPath Free’

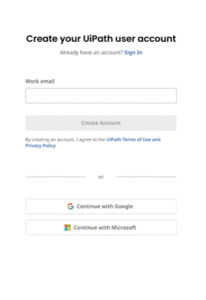
- Sign in with our account: First time signing in to the UiPath Automation Cloud, we must first create an account. Here we can enter our work email address or choose to continue with Google or Microsoft.

Let’s create the account – select the admin tab on the left-hand side of the ribbon
Use Orchestrator to Invite Users and Allocate Licenses
- Go to the ‘Accounts and Groups’ In the ‘Users and Group’ section
- Click ‘Invite Users: enter the email address for the new user we want to invite
- check the ‘Automation Users’ group membership, and click ‘Invite’.
- go to the ‘Groups’ section: edit the group allocation rule for the ‘Automation Users’ Group
- allocate the ‘Automation Developer – Named user’ license type
This license type provides a unique user with full operational rights to Studio, StudioX, Attended Robot, Data Service, Action Center, and Task Capture
- Now let’s move to the Orchestrator tab on the left-hand side, select ‘Tenant’, and go to ‘Manage Access’.
- go to ‘Assign roles’ and select ‘User’
- type in the name of the newly added user
provide the ‘Robot’ role.
This is a mixed role and includes both tenant and folder permissions
- click next and enable the user to run automation
- We can now see in the list the Robot role assigned to the new user
Download And Install Studio
- let’s switch accounts: cloud.uipath.com
- search for the invitation we’ve sent in the rpa developer mailbox
- click ‘Accept Invite
- sign back in to UiPath Automation Cloud using the rpa developer account
- now accept the invite and access the specific organization
- now logged in with the new user
- Download Studio
- run the installation package and select the Quick Installation for Community Users.
- Perfect! Let’s launch Studio and create our first process
- chose to stay signed in to Automation Cloud
- browser now prompts us to open UiPath
- Open UiPath to return to Studio and continue
- Studio backstage view : desired, we can choose between Studio and StudioX profiles by accessing the Settings tab, then clicking License and Profile
Studio to Create a New Project
- click Start and then Process
- ‘UiPath First Run’: supply a location, and a description
- Let’s click Create
- we open the main workflow
- Add a simple message box activity that will display a message on the screen when run. We can add activities from the Activities panel or just by clicking the plus sign in the workflow
- Add Message Welcome “Mukesha”.
Publish to Orchestrator
- let’s go to the Design tab and click Publish to publish our process to Orchestrator
- On the ‘Package properties’ tab, we can supply a new package name.
- add a certificate if needed
- Let’s click Publish.
- The Info dialog box lets us know that the project was successfully published.
- Run the process with UiPath Assistant. type UiPath Assistant in the Windows search bar
- We can see the newly published process in the Processes list.
Use UiPath Assistant to run
To run it, let’s click Run.
- ‘Welcome to mukesha’ message box is shown on screen
UiPath Setup Account - Key take Away
UiPath Account Setup Here are some of the key takeaways:
- An Automation Cloud account allows a user or robot to authenticate on your UiPath platform and to receive authorization to access the resources of your various UiPath products.
- In Orchestrator, on the Manage Access page we can define and assign roles. We use roles to control the level of access an account should have.
- The ‘Robot’ role is a mixed role and includes both tenant and folder permissions.
- In Studio, access the Design tab and click Publish to publish a process to Orchestrator.
- To Run a process published to Orchestrator, we can open UiPath Assistant, select the process from the list, then click Run.
